The Gallery Wall is up!

Ok, so I have wanted a gallery wall ever since Pinterest first came in to my life.  But like I said before, I didn’t want to put a million holes into someone else’s wall!  Plus, a gallery wall is kind of dictated by the shape/size of the wall it goes on, and I never really wanted to go through the big long process of making one if it may not fit in OUR home.  So, the first chance I got, I set out to build my very first gallery wall!  Here was my process:

Step 1: Make a plan.  This was the most fun part–determining what would go ON our wall.  I wanted to ensure it was a mixture: of colors, prints & pics, memories, sizes, depths, textures, etc.  Once you have an idea of what you want to frame, decide what sizes and move on to step 2!

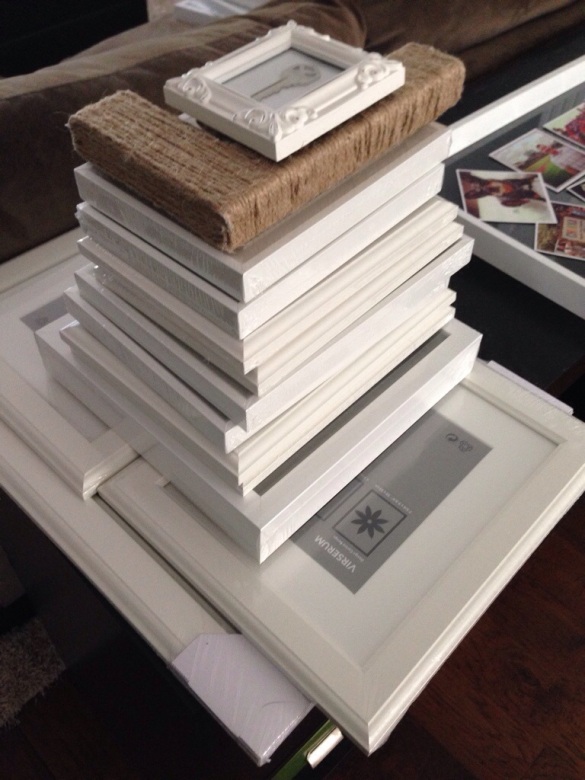
Step 2: Buy your frames.  I purchased mine at Ikea and Hobby Lobby, and chose for them to all be the same color (with some variations in the actual frames and details).  I know some peeps go with different colors but since we had a lot of color going on INSIDE the frames, white seemed like the cleaner, safer bet.

20140616-145406-53646586.jpg

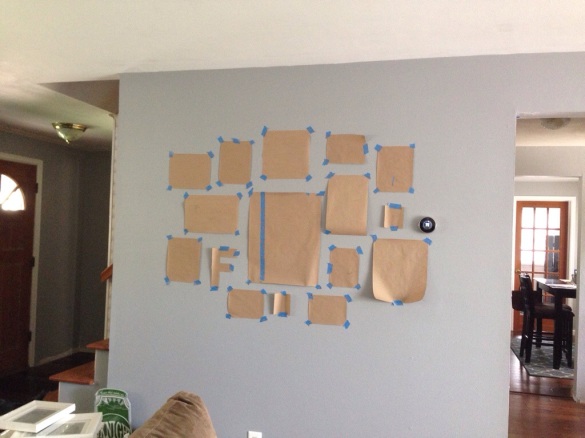
Step 3: Trace your frames & tape up placeholders: Yes, I traced all of my frames, and no, it didn’t take that long at all (the whole process was about 10 minutes).  This allowed me to play around with the alignment.  I know there are several methods for this (like laying them out on the floor first) but I felt this allowed me the most freedom and let me actually get a feel for the spatial layout on the wall.  I started with my biggest frame and worked out from there.  I tried to keep some symmetry but also felt free to mix it up.  After some small adjustments, I made sure the whole thing was centered on the wall (which required me to move every frame over by 2 inches), which I didn’t actually do, just noted for step 3…

20140616-145407-53647470.jpg

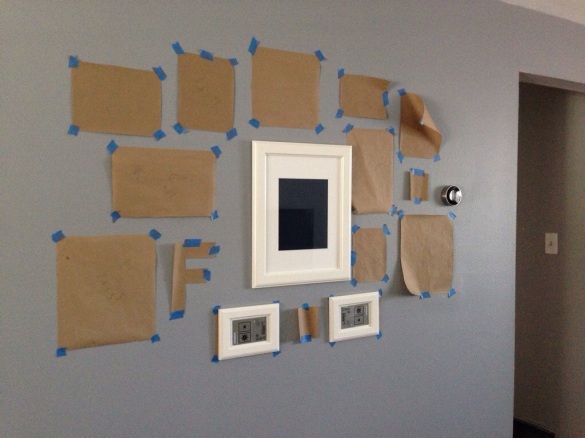
Step 4: Measure, measure measure!  Once I had my first frame in place, I began the measuring and leveling game.  It may not look like it, but all of these frames are a pre-planned width apart.  They’re not all the same width, but it was planned!  I had to make sure they were the same width AND height away from the next frame, so this involved a whole lot of measuring.  I would mark directly on the paper, nail through it, then pull up the paper when I was done.  Easy Peasy!

20140616-145408-53648361.jpg

Step 5: hang your pictures, step back and enjoy your handy work!

20140616-145410-53650208.jpg

20140616-145410-53650996.jpg

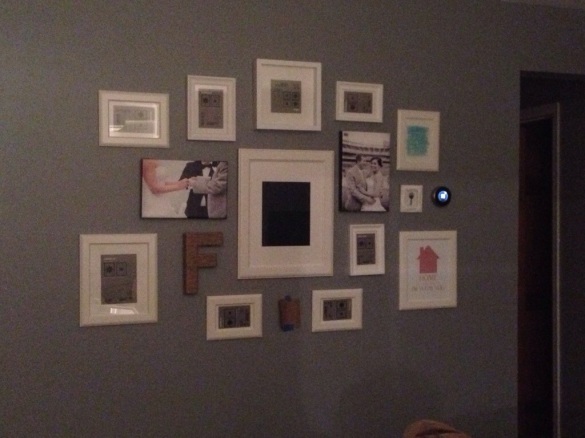
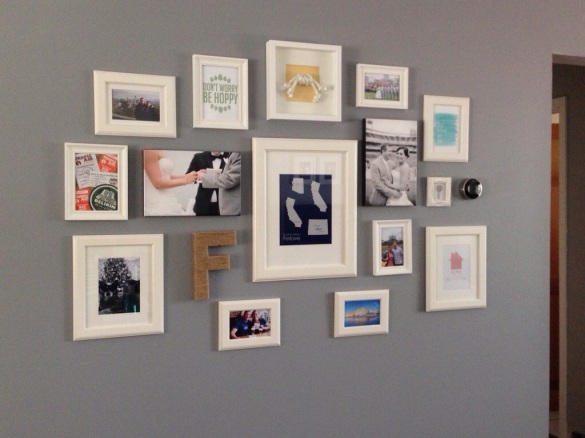
Ta-Da!  Here’s our gallery wall!  Here’s what we chose to put up:

  • Pictures of us on our trips (Seattle, San Francisco, San Diego, and Chicago made the cut)
  • Wedding canvas prints
  • A picture of our wedding party
  • Tickets from our honeymoon in Belize
  • The key to our first house
  • A Tour de Fat token (one of our favorite beer festivals)
  • The letter F (our last name)
  • A shadow box with the rope that we tied during our wedding ceremony
  • And 4 prints: A “met, married, live” graphic with our info, a “Don’t worry be hoppy” print to symbolize our love of beer, a “Home is wherever I’m with you” generic print, and finally, a “Life is better in flip flops” print to sum up our casual nature (and a throw back to Scott’s beachy roots). 🙂
  • Oh, and the Nest 🙂

We went back and forth as to whether or not we should put pictures of us with friends up there.  Obviously our friends are a huge part of our life, but ultimately we decided against it because a) I wanted to put those in other, less formal places in the house, b) I wanted this wall to mostly be about us, and c) I would feel bad putting some friends up and not others.  Can you imagine coming over and seeing that you didn’t make the wall?!?!  Seriously, it makes me feel bad just thinking about it!  In the end only the wedding party makes an appearance, which seems fitting since they did get all dressed up for it, after all. 🙂

The best part about this is that you can change out the pics and prints any time you want to.  I can’t wait to see this wall evolve as we continue to travel and grow together.

A little kitchen progress

Scott and I have been SIGNIFICANTLY slowing down on house work, despite the huge list of things we still have to tackle before our house is “show” worthy.  This weekend we plan to finish off the entry and repaint some areas downstairs.  As I shared before, I am NOT looking forward to doing the entry, so to give myself a little motivation, I thought I’d share this little gem:

Progress!

That’s a before, during, and “still during but closer to after” photo of the progress on our kitchen.  Besides the hardwood, we opened up the pantry, built the shelving, attached the doors, and hired someone to close off the other (now gone) door. It may not look like much, but this little shot represents a huge part of our progress, and is the reason our kitchen above all feels like the heart of the home for us.

When I get frustrated this weekend (which I undoubtedly will), I just need to remind myself that the middle is messy and that this WILL be worth it in the end!

After NINE DAYS of vacation…

I am finally back to work (though taking a little break to write this post :)).  While my “vacation” wasn’t exactly a vacation (I was working on the house, unpacking, or running around town for errands all day, every day), it was nice to not feel chained to my laptop.  I even deleted work email from my phone–the only other time I’ve done that was for the wedding/honeymoon!

Out of the last 9 days, we’ve been living in this house for 8.  Of course it’s an adjustment, but with incredibly few exceptions, we have absolutely LOVED living here. (I’m still not sure about this whole “two-story” thing…)  From day 1 our living area has been put together (for relaxing), my office was assembled and cleaned up early last week (critical when you work from home), and we prioritized getting the kitchen put away/the pantry built the first chance we got so that we could resume cooking ourselves.  We also made sure to have our patio furniture assembled and set-up–porch time is big in the Fellows household!  Last night we cooked our first real dinner, had a beer on the porch and chatted up our new neighbors (and found out our neighborhood is having a block part in July–I LOVE THIS PLACE!), and even went out for fro-yo.  Yep, things are getting back to normal around here 🙂

Even so, there are still just a few things that need to get taken care of (soon) in order for us to move from the “working on the house” phase to a full on “living in the house” phase.  I’m not sure when we’ll get to all of these, but here is the remaining to-do list:

  • Install hardwoods in the entry: We’ve been avoiding this task mostly because it’s the hardest.  The entry has door frames, stairs, a half wall and closet–countless little corners that need to be measured (twice!), cut with a jig, then fitted and glued.  This small area may take us an entire day!  We’ve been using the bathroom work upstairs as an excuse (I don’t want our new floors to get scuffed up!) but as that comes to a close, we’re running out of reasons to avoid this…
  • Add transitions to the floors: Once all of the hardwoods are finished, we need to install the transitions.  We only have a few to do and these should be simple, but the fireplace and basement stairs may prove challenging.
  • Paint and re-attach baseboards: NOT looking forward to this!  The unspoken steps here include sanding the baseboards and replacing those that were damaged/broken during removal.  That means matching the baseboards, miter/angle cutting them, and lots more math than I feel like doing.
  • Paint and re-hang doors: Seems obvious.  I’m starting to regret we ever took them down…
  • Paint the window and door trim: This house weirdly had half of its door and window trim painted, and the other half just the color of the wood.  It’s like they started to do it, then realized how not-fun this project was and quit.  THANKS SO MUCH!  When the trim is painted it just looks so much better/more put together, so we’re prioritizing this.
  • Paint the entryway: Simple enough, and such a small space this won’t cause too much grief.
  • Paint touch-up the downstairs (including the ceiling)
  • Paint the Pantry doors (I think you see a theme here…)
  • Finish Pantry shelving: We decided to save ourselves time (and money) by only building the back floating shelves for now.  We do want to add more shelving to the side and some spice storage but this may be towards the bottom of the list for now.
  • Clean out the garage: Right now it is full of boxes, drywall sheets, and random tools.  Once Jim is finished up, we’re going to prioritize cleaning and organizing so we can maybe put, I dunno, a car in here?

This week I think we’re going to tackle finishing up the floors and transitions, the painting of the entry and trim, and cleaning out the garage, but even that feels ambitious right now…  Wish us luck!

Front Door Face Lift

While work on the bathroom is finishing up, I’m keeping myself busy with unpacking and tackling small little projects (at least until the weekend, when we plan to get after the pantry).

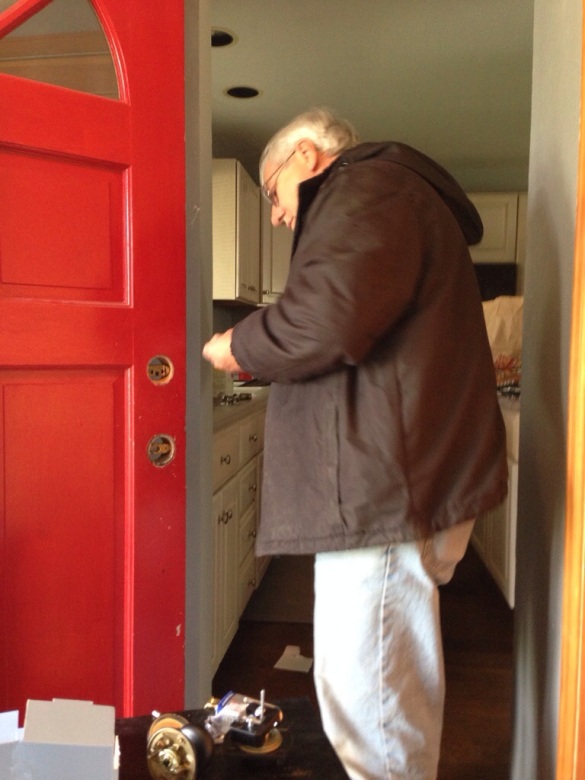
One of these small projects was the front door.  This week we (finally) decided it was time to buy a new lock set and lucky for me, Jim was here when I tried to install it… It took him 45 minutes (and various tools I do not have) so I can only imagine how much of my day (week?) would have been wasted if I had attempted this myself!

20140502-132810.jpg

Once the lock set was on I loved the new look and color, but realized quickly that it made our sweet little brass knocker look 13x more hideous…

20140502-132759.jpg

Mismatched Metal. Sooooo hot right now. Except, not.

Nothing a little ORB spray can’t fix!!

20140502-132817.jpg

You down with ORB? (yeah you know me!)

And there you have it: a mini-facelift for the front door!

20140502-132832.jpg

Ta Da!

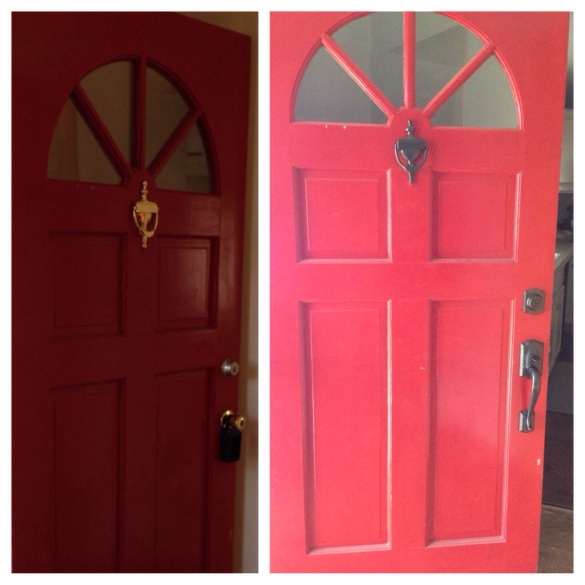
And just for fun, a little before and after action:

20140502-143059.jpg

While we’ve still got a to-do list a mile long, this place is starting to look like home (it’s felt like home from the moment we moved in:)).  Weekend projects include:

  • Build shelves for the pantry
  • Hang French doors (again, pantry)
  • (Re) Paint the entry and touch up spots we missed before
  • POSSIBLY start on the hardwoods in the entry (but probably not…)
  • Unpack, unpack, unpack!

We also hope to partake in some Kentucky Derby fun, spend some time outdoors exploring our new ‘hood, and take the pups to the watering bowl so who knows how much we’ll actually get done.  We figure we’ve earned a little break.  And besides, this place isn’t going anywhere,  anytime soon–and neither are we 🙂


House Projects: Week 2

So, I’m a little tired. It has been a LONG last few days!

BUT, still very, very excited to share the updates we were able to make to our place in the last week!  It seems we had a lot of little things going on that kept us from being at the house quite as much as we would have liked.  Monday was the NCAA Men’s basketball final, and Wednesday was a beer dinner with friends.  Oh, and yesterday was our first year wedding anniversary so we took most of the day off to celebrate (first a friend’s birthday, then off to drinks and dinner with the hubs!) but I still think we were able to make a fair bit of progress!

The Kitchen:

  • Drywall work: The kitchen made the most progress, thanks to some serious drywall being put up.  The former door-to-nowhere has been walled off and looks BEAUTIFUL.  The pantry door has been framed out and is ready for a jamb and some doors.  once we get those bad boys in there it is going to look so, so polished.
  • The floors/thin set from hell: When I walked in to see the progress on the kitchen floors Wednesday, i almost died.  Our floors…were…smooth..?!? I wanted to roll around on them, I was so happy.  I know they will eventually get covered up with hardwoods but for now, I do a little dance each time I pass through the kitchen and see them–thinking about the HOURS and DAYS of our lives that we saved by choosing to not DIY this part.
20140414-082425.jpg

Smooth as a baby’s bottom!

20140414-082436.jpg

Door to nowhere is GONE! Pantry door is prepped! I’m loving this angle of the house.

Upstairs:

  • Priming and Painting: We spent the bulk of Friday night ensuring that both the bedroom and office were primed.  For some reason, I decided to do this WITHOUT the edger so it took FOR.EV.ER.  Scott finished off with the roller.  Yesterday my friend Treana came over and we put the first coat of paint up in the office.  It’s Palladian Blue by Benjamin Moore and I’m in love!  It’s such a dynamic color and makes the room feel so BRIGHT!
  • Master Bathroom Floor: On Saturday, Jim shared that there were some problems with the sub floor in the bathroom.  Turns out they had used fiberboard (think sawdust and glue) over the sub floor which of COURSE is not water resistant.  As a result, it leaked through over the years and damaged the sub floor.  Before we could replace it, we’d have to rip it ALL OUT.  Scott was itching for a manly project, so he did it himself.  It was disgusting work but my man got ‘er done!
20140414-094410.jpg

Apparently he didn’t remember there was once a toilet there. A LEAKY ONE, by the looks of the plywood. SICK!

20140414-094423.jpg

Doin’ work in the bathroom! (er, a different kind of work, in the bathroom…)

20140414-094430.jpg

That my friends, is a bathroom sub floor that needs a little work.

20140414-082548.jpg

Not totally true-to-color, but the closest I’ve got. I LOVE the new office paint!

Living Room:

  • Drywall work: The drywall holes from the built-ins were fixed, and the walls were sprayed to blend in and re-texture.
20140414-082455.jpg

Drywall patched and re-textured. It’s as if the built-ins never happened!

And that’s it!  There was also quite a bit of priming and painting that went on downstairs, but that is for another post. Progress feels slow but considering we took quite a few nights off, it still seems solid.  I hope we can really buckle down and finish up the major projects this week so we can focus on actually packing up!

My list for this week involves:

  • Finish painting the first floor
  • Move the thermostat to a normal person height
  • Paint the ceiling in the kitchen
  • Kick off installing the hardwood floors
  • Get our new shower installed
  • Tile the master bathroom floor

I know it sounds crazy, but what can I say?  the Fellows are an ambitious crew! 😉